Looking for Something? Search here:

Showing posts with label meats. Show all posts

Sunday, October 04, 2015

Home Made Sausages


Making home made sausage is fun and can be frustrating at the same time.  Luckily we have this sausage maker attachment to our kitchen aide mixer, which does made life a little bit easier.  At first it was tricky but then we figure out some cheats to do it a little bit faster.  It should be fun to make it with the family as doing it alone isn't really that fun with all the mess you have to deal with, but at the end of the day you realize its is really worth it.  You can control the seasonings, amount of fat that goes in that sausage, and best of all,  no preservatives and the relief that you know what is in that sausage you are having on the table.


Here is a quick video of what we've done.


We are often frustrated with store-bought sausage, most of the times, there is so much fat in it. You can see as it you cook further, the amount of fat you that goes to the sides of your pan, which i usually spoon out to the drain. Aside from that amount of fat, sometimes it just have a nasty smell of "not so good" meat then you start to wonder, what is in this sausage?

Collagen Casing
For our homemade sausage, we used pork loin and shoulders (less fat).  For the casing we used the collagen casing  which is ready made and it is available in barbecue aisle of most shops, we bought ours from Academy Sports + Outdoors.
sausage making kit attachment

Kitchenaide mixer with attachment
finished product: homemade sausages
So, there won't be any recipe for this post as everything weren't measured, but bare in mind that when you make sausages, you better make a lot as it is a lot of work.  Freezing them makes it convenient. I hope to update this post with specific measurements, but for the time being we didn't bother to measure. All ingredients were estimated as per proportion of the meat.  We certainly used lean meat, cut it in cubes, seasoned it with salt and pepper, a little bit of paprika, cayenne pepper,  garlic powder, and onion powder.  Then comes mine and daughter's favorite part being the critic plays the crucial part. Tasting!  Hubby did a mini burger and cooked it over a heated pan subject to our criticisms.  Hubby then adjusts what is needed and if agreed with satisfaction, the fun begins with stuffing the casing.  I haven't took the video during stuffing as we were all got busy hands.

We usually serve sausage with salads and vegetables, or with egg for breakfast.  L loves it with a hotdog bun for school.  Sometimes pasta, or it is also good just as it is.

Thanks to hubby, who did most all of the job.  We were just helpers on the side waiting for his command. We really enjoyed making it for the 2nd time now, and i guess it won't be the last.  Rest assured, we won't be buying sausage from stores anymore.


Thursday, July 31, 2014

Crispy Chicken Strips


Crispy Chicken strips
Crispy Chicken Strips

This is so simple and easy to make.  I like the versatility you can do with this.  Can be served with any of your favorite sauce or dip, or salad, potatoes, or rice. The cornmeal is the essential ingredient for its crispiness that you don't have to worry if it sits for awhile, without getting soggy.  I guess i don't have to elaborate more on the quantity as it is self-explanatory.  The more chicken, the more flavoring and coating you need.  Rough estimates won't do harm.
Ingredients:
Chicken Breast (sliced into thin strips)
dried oregano
pepper (freshly ground)  ( i used pepper grinder all the time)
salt
oil for frying

Season the meat with salt and pepper, add a generous amount of oregano,  Give it a little rub so it will stick to the meat.
In a bowl, place the corn meal,  Add the meat and set aside. Shake each strip to get rid of extra cornmeal before frying.
Heat the pan and add oil for frying.
shake to get rid of extra cornmeal before frying.  Shallow fry for about a minute each side until golden brown.


watch the video:


Wednesday, October 21, 2009

IMBUTIDO


Imbutido is a Filipino meatloaf made of minced meats,vegies and spices. It is one of the mostly loved occasional recipes at all times.

Imbutido can be prepared ahead of time that's why I love making them because I can make it in advance. It is a big job of chopping the ingredients finely but with a food processor, it does the job well in no time therefore saving a lot of my energy. I prefer to buy lean meat and grind it with the food processor together with onion and garlic. It makes the meat well flavored before I add in other ingredients. Another advantage is you choose the meat that goes into it, rather than buying minced meat that has plenty of fat in it.

For shaping the imbutido into a log shape, you will need aluminum foil (10" x 12" per log) and sushi mat for easy rolling up.

This mixture yields 12 logs about 2.5 diameter each.


Ingredients:
3 pcs. Onions
1 whole head of garlic
½ kg. minced beef
1 kg minced pork
6 pcs. Chorizo (bilbao)
1 jar (180 g) pickles (baby gerkins)
¼ kg carrots
¼ kg green and red bell pepper
5 pcs eggs
¼ kg flour
100 g. raisins
Salt and pepper

For filling: boiled sausage or hard boiled egg (sliced into quarters)

Procedure:

Finely chop onion, garlic, chorizo, pickles, carrots, red and green peppers. In a large mixing bowl, mix the finely chopped ingredients with the minced beef and pork until well combined. Add eggs and mix well, add flour and mix further until well combined. Season with salt and pepper, add raisins and mix well.

On a flat working surface, place a sushi mat and lay aluminum foil flat on the mat. Place a portion of meat mixture about 3 inches wide leaving at least 2 inches at the end of the length of the foil for sealing the ends. Place the filling either sausage or hot dog at the center of the mixture along with its length. Roll up the sushi mat making the mixture round making sure that the foil is tight as you roll. Start sealing the ends after the first roll and continue rolling up until the end of the foil. Seal the ends by pressing and twisting the ends of the foil taking care not to make it overly tight so that foil will not break up.

Set up the steamer and steam the wrapped imbutido for 45 minutes.


To serve: slice imbutido into rings. Remove the aluminum foil and serve. It can be served warm or chilled in cold cuts.


Storing: Imbutido can be stored in the fridge for 1 week.

Sunday, September 21, 2008

Roasted Pork Belly with crispy crackling

This one pot dish is heavenly delish.. Love the crispy crackling skin! Nope it wasn't me who made it, it was my dear hubby. This can not be done quickly as it will take two hours of roasting in the oven. But it was worth waiting and the house smelled like there was a big feast whilst it was just the two of us feasting on this for lunch with a bottle of red wine. Tell you what, it wasn't really that heavy lunch. It was light meal full of goodness. Light in a sense that the portion was just enough. The potatoes were perfectly done, not overcooked, carrots were still a little bit firm to the bite, it was just the cabbage were a little bit overcooked. The meat was tender on the inside, well done but what I love the most was the crispy skin! That crackling sound every bite was the highlight for me.

I could have elaborated more on its procedure how it was done if I made it myself, but I was busy with other houseworks and left hubby in the kitchen. All I know is he seasoned the pork belly with olive oil,salt, pepper,thyme (dried), fresh basil and parsley (from our tiny garden). He seasoned the meat nicely by massaging all the flavors into it for few minutes. In an oven proof dish, he put quartered potatoes, chunks of carrots, cabbage and the remaining marinade from the meat. Placed the pork belly on top, added a glass of white wine and roast for 2 hours in the oven at gas mark 7 and finished with gas mark 8 on the last 10 minutes.

This was an indulgence for us because we have been watching our fat intake but we are not really that strict on our diet and once in a while, we treat ourselves with good stuffs, needless to say, some good foods are packed with fats.

Saturday, January 26, 2008

Grilled Skinless Chicken Breast


This is quick, easy and simple meal. I can do it with closed eyes! Simple flavors! It’s been a while I’ve been avoiding deep fried foods, healthy options are steaming, grilling, pouching, boiling, pan-frying or stir-frying. Most of the time I go for the grill.

Ingredients:

2 chicken breasts
Salt and pepper
1 Tbsp. cooking oil

Procedure:

1. Preheat the grill.

2. Remove the skin and sinew of the chicken breasts.

3. Make slits with the chicken breasts by making a diagonal pattern.

4. Season the chicken with salt and pepper

5. Sprinkle oil on the chicken

6. In a preheated pan, sear the chicken with the sliced side down for 2 – 4 minutes or until golden brown. Turn the chicken upside down and continue cooking for another 2 minutes. Literally, just brown the chicken with a very hot pan to seal its juices inside.

7. Transfer the chicken to an oven-proof dish and grill for 4 minutes each side.

8. While the chicken is in the oven grill, pan-grill some vegetables like carrots and onions on the same pan used with the chicken. This will absorb the flavor of the chicken at the same time it caramelizes the vegetables and bring out its natural flavors. Pan grill until the vegetables are charred, or when you can see some black chars on the veg.

Serve immediately.

Thursday, January 17, 2008

Sweet & Spicy Chicken Wings


Sweet & Spicy Chicken wings (served with potato wedges)

I didn’t measure the ingredients, so its just a matter of preference how spicy or how sweet you like to have. The marinade shouldn’t be too runny, so avoid using so much soy sauce as it would just be wasted and the flavors are loosened as well. So, to keep the flavors intact, just keep nicely moist leaving you just enough marinate to baste on the wings when grilling.

Ingredients:

Chicken wings
Paprika
White pepper
Chili powder
Honey
Soy sauce
Salt

Procedure:
Wash and dry the chicken wings and pat-dry with kitchen paper. Season chicken wings with salt and pepper and massage the meat so that flavors will be absorbed. Add paprika, honey, pepper, chili powder and soy sauce. Marinate for at least 30 minutes so that flavors would develop nicely. Preheat oven grill at high temperature.

Grill for 15 minutes each side, brush the remaining marinade onto each side before turning, until chicken wings turn dark brown and well done, but still moist inside. Overcooking makes the chicken dry.

Meanwhile, while the chicken wings are on the grill, prepare potatoes. Cook potatoes in boiling salted water for 10 minutes or until just done, but not over-cooked. Cut the potatoes in wedges. In a hot oiled pan, pan fry the potatoes, sprinkle with salt, pepper, garlic powder and a little dash of paprika. Continue pan frying until the sides of the potatoes turn golden brown. Drain in kitchen paper.

Remove chicken wings from the grill and serve with potato wedges.

Tuesday, January 15, 2008

Mutton Sio Mai


Mutton Sio Mai

We are a big fan of dim sum restaurants and once in a while at home we crave for it. The key to a tasty dim sum dumplings is to cook with a bamboo steamer. I have tried doing it in my metal steamer, there’s nothing like it with a bamboo steamer! It’s the flavor and the aroma that has stucked into it that gives a special touch. In my quest to find a bamboo steamer, I’ve been to china town, but wasn’t successful. I’ve seen huge gigantic bamboo steamer which is not what I’m looking to buy! Not until now, a colleague of hubby was kind enough to buy it for us, and we are very pleased to have a medium sized bamboo steamer in four layers. We just got it last night and we wanted to try it right away! Just in time, I have frozen dumpling wrapper which have been sitting in the freezer for quite some time now, But the available minced meat I have is mutton and mutton only! I haven’t had mutton sio mai in my life, but that didn’t leave me any much choice but to try making mutton sio mai. My imagination had worked fantastically with the flavors, hence I put spices that I haven’t used with chicken or pork dumplings. I added chili onion, mushrooms which worked out just well!

Ingredients:
¼ Kg minced mutton
1 can button mushrooms (diced finely)
1 large white onion (diced finely)
1 red chili (diced finely)
1 green chili (diced finely)
6 Tbsp. Soy sauce
1 Tbsp. sesame oil
2 Tbsp. corn starch

Soy Sauce:
¼ C. Soy sauce
2 Calamanci (small lime)
½ tsp. Sesame Oil

Procedure:

Prepare all the ingredients and place everything in a mixing bowl. Mix vigorously with your hand, you may wish to use plastic gloves, as I did, until all the flavors have been blended together. Let it stand for about 10 minutes that the flavors will develop nicely.

Place 1 teaspoon of meat mixture at the center of each dumpling wrapper, pat with water around the meat using your finger. Gather the edges of the wrapper up forming pleated raffles. Tap on the table to flatten the bottom of the siomai and squeeze a little just before the edge of the wrapper, leaving a little meat exposed. Do this until all the meat mixtures have been wrapped, then you are ready to steam.

To use the bamboo steamer, place about an inch deep of water in a large woke, taking care that the water should not get out of the rims of the steamer. This is important to keep the steam inside the bamboo steamer. Bring the water to boil and reduce the heat when it is bubbling already. Brush with the base of the bamboo steamer to avoid the dumplings sticking onto it. Place the dumplings in each base keeping a little distance in between each dumpling.


Stack the bamboo steamer over the simmering water and cover the last layer.


Cook for 15 minutes. Serve with soy sauce.

This siomai is just perfect to our taste, and I shall do it again! It’s even better than what I have tasted in the food court of KLCC which was a little bit commercialized, I should say.

Hubby was so impatient infusing flavor and aroma with the new bamboo steamer, he steamed by adding onion, garlic to the water instead of just plain water, I find it a brilliant idea. Hence, now we have a bamboo steamer that smells like it is used since a long time.

I have posted Chicken Siomai long time back, say 2 years ago, when we were in Angola. I did it quite differently as I have to settle what I can find there, and I even used bread crumbs coz I cant find cornstarch in the supermarket, and I remember there is no available sio mai wrapper there, so I used the spring roll wrapper instead and cut them into small pieces. Those were the days when I was living in (T.I.A.) which means “This Is Africa”. I tell you, it was not easy!

Monday, January 07, 2008

Hummus - A Spread that makes a difference!

My first entry to GYO (Grow Your Own), a monthly food blogging event that celebrates that we grow ourselves and the dishes we make using our homegrown products. For more information about GYO, click


  • Here
  • .


    Hummus is a popular dip or spread in middle eastern countries. Its primary ingredient is chick peas mixed with garlic and lemon juice. There are many variations with spices as well.


    The hummus takes the center stage of this recipe - The spread that makes the difference! Since we are not in Middle Eastern country, we can’t easily find a good hummus unless you make it at home

    Since Hubby and I have lived in the middle east for quite some time, it is not unusual for us to crave for some Arabic foods that have influenced our palates like Shawarma – a popular street food made of flatbread filled with meat either chicken, beef or lamb and of course with hummus as spread. In other countries it is popularly known as wraps, but the spread is not hummus, made of mayonnaise with other variations but it’s the same idea, it is a wrap basically, but its a makes a complete meal coz it has the basic food groops, ie, carb, vegetables, meats, and its worth mentioning, the chickpeas is full pack of protein, iron and vitamin C.

    Ingredients:
    1 can chickpeas (cooked)
    2 tsp. ground cumin
    1 tsp. paprika
    1 tsp. cinnamon powder
    Juice of 2 lemons
    2 cloves garlic (grate)
    ½ Cup Olive Oil
    Fresh Parsley and basil (chopped)

    Procedure:

    Grate garlic and set aside. Drain chickpeas and put in a food processor or blender, add lemon juice, grated garlic, cumin, paprika and cinnamon powder. Blitz for few seconds and stir. Blitz again for few minutes, while the machine is running, add the oil gradually until very fine and smooth. Garnish with chopped fresh parsley and basil.

    For this recipe which has garlic, it is essential to have fresh herbs to go with it to fight the garlic breath – a distinctive odor after having some sauces with garlic. One of the cures of garlic breath is having something green, means with chlorophyll. This works wonders! Usually in Middle Eastern countries, they serve this with lots and lots of rockets, the purpose of which is to avoid garlic breath. Parsley also works well with garlic. Having that in mind, that’s why I added some parsley to the hummus.


    As my option is not very limited, I just asked hubby to get me some parsley and pass it across the kitchen window, I got a handful of parsley and sweet basil, which was a great idea. So, having some greens at hand is very useful.

    Straight from my tiny garden are fresh parsley and basil which we have grown them ourselves. We have a tiny garden in our terrace which original a space for ornamental plants but we squeezed them to one side to give a space for some herbs. We planted some seeds when we came back from vacation. So now, we have parsley, sweet basil, Thai basil, and Kangkong. Now I’m enjoying my little harvest for garnishes.


    While the hummus is ready, prepare the meats to go with it.

    Ingredients:
    Beef
    Sausage
    White onion
    Tomatoes
    Cucumber

    Slice onions and tomatoes thinly. Set aside

    Slice the beef thinly and set aside

    Grill the sausage.

    While the sausage on the grill, in hot pan with a teaspoon of oil, sear beef by adding one slice by slice so that the beef will not curl up when cooked. Stir-fry until the sides of the beef is done. You can tell when its done when the sides of the beef slices turn dark brown. Remove from pan. Add the sliced onions to the same pan. Do not be tempted to add oil. Just brown the onion by moving it around, taking the flavor of the beef at the same time. Remove from pan. Take out the sausage on the grill and slice thinly.

    Assemble the dish on a big tray and serve with flat bread on the side. Serve while the meats are still warm.

    Thursday, December 27, 2007

    Christmas Honey Glazed Ham


    Christmas Honey Glazed Ham

    Ingredients:
    5-6 lb. fully cooked ham
    1/4 cup whole cloves
    1/4 cup dark corn syrup
    1 1/2 cups honey
    2/3 cup butter
    1/8 tsp. white & Black pepper

    Preparation:
    Preheat oven to 325 degrees F. Place ham cut side down in a foil-lined roasting pan. Using a sharp knife, score the surface of the ham in a diamong pattern. Insert a clove in each of the scored intersections.

    Combine corn syrup, honey, butter, and pepper in the top half of a double boiler, and heat until the butter melts and mixture is smooth, stirring frequently. Keep the glaze on the top of a double boiler, over hot water, while baking ham.

    Brush glaze over ham. Bake for 1 hour and 15 minutes at 325 degrees, basting ham every 10 to 15 minutes with the warm honey glaze. Remove ham from oven, cover with foil, and let sit for 10 minutes before serving. Just before serving, caramelize the glaze and serve it with the ham.

    Monday, December 10, 2007

    Roasted Duck with Vegetables


    Ingredients:

    2 Pcs. Duck Thighs
    6 Pcs. Medium potatoes
    6 Pcs. Baby Carrots
    4 cloves garlic
    1 Pc. Onion
    Thyme
    Salt & pepper to taste
    1/2 tsp. olive oil

    Procedure:

    Preheat oven to 350 degrees C.

    Season the duck with salt, pepper and fresh thyme and set aside.

    Meanwhile boil the potatoes with water for 3 minutes and cut into wedges. Slice Onion in wedges. In a baking dish, put potatoes, onion, garlic, baby carots and season with salt & pepper and set aside.

    In a preheated pan, add 1/2 teaspoon olive oil, add in the seasoned duck thighs, skin-side down, pan fry for 3 minutes each side until skin turns golden.

    Place a rack above the baking dish with the vegetables in it. After pan frying the duck, place them on the rack and sprinkle over the remaining duck fat in the pan. The drippings from the meat will flavor the vegetables. Continue cooking in the oven for 45 minutes or until done.

    Serve with bread.

    Wednesday, January 31, 2007

    Egg Surprize

    Egg Surprize

    Ingredients:
    Oil for deep frying
    1 kilo ground pork
    1 onion (finely chopped)
    Coriander (finely chopped)
    Salt & pepper to taste
    6 boiled eggs
    2 slightly beaten eggs
    Bread crumbs

    How to:
    Season ground pork with onion, coriander, salt & pepper. Place a plastic cling wrap on a flat board. Form a ball of the seasoned ground meat on top of the plastic wrap. Place another plastic cling wrap above the meat and flatten the meat with the palm of your hand. Do this by pressing it slowly until flat forms a round flat meat. (as shown in the picture) Remove the plastic on top and place the egg at the center of the meat. Form the meat into an egg wrapping the egg. (Shown in the picture) Remove the plastic at the bottom or the meat. You now got an egg wrapped with the seasoned meat. Dip into beaten egg and then roll into the bread crumbs for coating. Do this procedure twice (coating) to achieve a firmer coating by dipping the egg formed meat again into the egg and roll again into the bread crumbs. Deep fry until golden brown. You’ll get a crispy crust with tender meat and a soft egg inside.. lots of texture lots of flavor. That is a real egg surprise! Good for outdoor picnic.

    Stuffed Pork Rolls

    Stuffed Pork Rolls
    Ingredients:
    Oil for frying
    slices of lean pork
    Salt & Pepper
    Finely chopped parsley

    How to:
    Flatten slices of pork with a meat tenderizer. Season with salt & pepper and sprinkle finely chopped parsley. Roll the piece of meat and tuck with toothpick. Set aside. In a nice and hot flat pan, pan fry the stuffed rolls of meat setting the sealed side down. (Toothpick removed) When slightly brown, turn the meat over slowly until done. Remove from pan and bake for 10 minutes more at 190 degrees F. This allows the meat at the inner core to be cooked. Remove from oven. Slice and serve with mashed potatoes. Garnish with a tomato rose.

    Stuffed Chicken Breast

    Stuffed Chicken Breast

    Ingredients :
    2 Pcs. Chicken Breast (deboned)
    6 Tbsp. olive oil
    2 pcs. white onion
    4 cloves garlic
    1/4 Cup All Purpose cream
    4 Tbsp. white wine
    2 Tbs. onion-tomato sauce
    1/4 Cup chicken stock
    1 lemon
    salt & pepper to taste

    Procedure:
    Slice a slit into chicken breast, just enough to form a pocket, do not split into two and set aside. Crush garlic and sprinkle with salt. Insert the garlic into the pocket of the chicken breast, season with salt and pepper and rub the rest around the meat. Add onion-tomato sauce into the pocket. Close the pocket with the edges of the meat and rest the sealed down. Heat olive oil in a sauce pan and add gently the stuffed chicken breast with sealed side down. Fry for 3 minutes or until golden brown and turn over until brown completely on both sides. Remove from pan and set aside. With the remaining oil in the pan, add onion and sautee until soft but not brown. Add white wine and juice of lemon. Simmer for 1 minute and add cream. Simmer for another minute and remove from heat. Add the creamy mixture to the fried stuffed chicken breast and serve immediately. This could be served with potato or rice. Enjoy!

    Monday, January 29, 2007

    Pan-fried Chicken breast with rice noodles

    Pan-fried Chicken Breast with Vermicelli (Rice Noodle)

    Remove the skin of the chicken. Slice diagonally on opposit directions forming crisscross cuts and rub with salt. Pan fry for about 2 minutes on each side to seal the meat until chicken turns golden brown. Continue cooking in the oven for 10 minutes at 250 degrees C.

    While the chicken is in the oven, prepare the vermicelli noodles. Bring to boil 1 liter of water , add salt and add the vermicelli noodles. Cook until al dente (Like cooking spaghetti). Do not over cook otherwise it will be very soggy. Rince the noodles with tap water and set aside. Stirfry onions, garlic and peppers (capsicums) and toss the noodles and continue stirfrying. Season with salt and pepper to your liking. Serve with the chicken.

    Chicken Sandwich with eggplant dip


    Chicken Sandwich with eggplant dip
    Flat bread
    Eggplant dip
    Grilled chicken breast (thinly sliced)
    White onion (thinly sliced)
    Red bell pepper (cubed)
    Tomatoes (thinly sliced)
    To make flat bread:
    1 cup flour (sifted)
    1 tsp. salt
    ¼ cup water
    Mix salt and flour in a mixing bowl. Add 1 Tablespoon water at a time while mixing until it forms rough dough. Add water if its too dry, this depends of the strength of the flour you are using. Knead the dough in a floured flat surface for about 3 minutes or until smooth and elastic. Form dough into sausage shape and cut 1 inch thick. Form each into a small ball and flatten with a rolling pin.
    To make eggplant dip:
    1 large eggplant
    1 cube chicken stock
    1 cup water
    Red pepper (diced)
    Tomatoes (diced)
    Onion (diced)
    Garlic (finely chopped)
    juice of ½ lemon
    chili powder
    pepper
    Determine a base for the eggplant and slice the skin off thinly; so that the eggplant will lay flat. Slice the skin off of the opposite side and carefully take the meat of the eggplant using a spoon. Dice the meat into cubes. Rub the exposed eggplant meat with lemon juice, wrap with plastic and refrigerate while making the dip. Sauté garlic and onion until translucent add eggplant meat, add red pepper, water and stock. Bring to boil and simmer for about 5 minutes until almost all of the liquid has evaporated. Season with pepper and chili powder. Place the cooked mixture into the prepared eggplant case. In a hot pan, add onion and red pepper; cook until caramelized.Assemble sandwich. Arrange in each flat bread with chicken onion, pepper as desired. Serve with the dip.

    Grilled Chicken Breast with Pepper Marmalade

    Grilled chicken breast with pepper marmalade
    Quite lazy for lunch and didn’t know what to do. Switched the TV channel to BBC Food and caught Sophie Grigson doing pepper marmalade for her dish with Trout fish, my tastebuds wondered if the marmalade would go with chicken, since I always have chicken breast in the fridge. Hmmm… yes the flavors are blending indeed! I’m quite lucky, I have all the ingredients which Sophie used except for red wine vinegar, which I don’t have, and I added yellow pepper to add color. I’m quite trained to settle with what I have huh, I used balsamic vinegar instead. I think everyone knows how to grill chicken, so I am just going to jot down for the marmalade, for the sake of the record. Well, thanks to Sophie Grigson!
    Ingredients:
    1 Red bell pepper (sliced in thin strips)
    1 Yellow bell pepper (sliced in thin strips)
    2 white onions (sliced thinly)
    4 Tablespoons olive oil
    2 Tablespoons balsamic vinegar
    2 Teaspoons sugar
    4 Tablespoons water
    2 Pieces Star Anis
    Preparation:
    Cook onion with olive oil, in medium fire, until transparent. Add the peppers and star anis. Continue cooking until peppers are wilted stirring occasionally, add balsamic vinegar, sugar and water, simmer until all the liquid has evaporated.Grill chicken and serve with the marmalade. This time, I served the dish with bread.

    Stuffed Chicken Rolls


    Stuffed Chicken Rolls
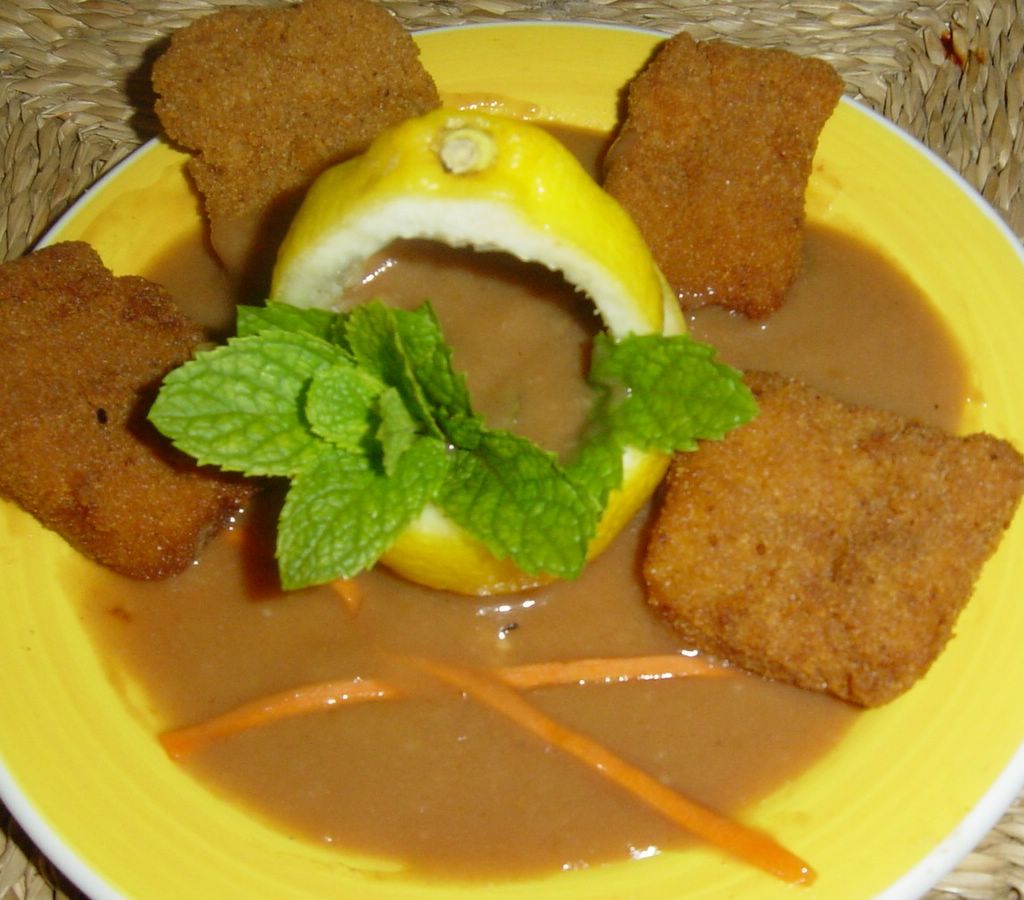
    Another Stuffed Meat! I love stuffing meats! It’s just like a surprise inside. So what’s the stuffing this time?? It is shredded potatoes seasoned with lots of pepper and dash of salt. Spicy inside coz I didn’t season the meat this time!Slice meat very thinly or flatten with meat tenderizer. Shred 1 medium sized potato and season with salt and pepper. Slice 1 medium sized potato as thinly as you can.Place the Shredded potatoes at one end of the meat and roll until you reach the other end.Tuck with toothpicks and fry. Not necessarily deep fry, just enough to seal the meat. Bake for 15 minutes at about 250 degrees C. With the same pan, add the thinly sliced potatoes. This will absorb the drippings of the meat while being fried.Serve the dish with sauce.This is good for 1 meal. 2 Potatoes are enough for one person, don’t forget the other one is inside the meat. Here, I got a spare empty passion fruit where I placed the sauce. It is just for the sake of ArT!

    Meat Cuts 'n Gravy

    Appetizing Meat Cuts 'n Gravy

    Ingredients:
    Lean Beef cut into cubes
    Chicken Breasts Cut into Cubes
    Salt & Pepper
    Bread Crumbs
    Parsley (finely chopped)
    Lemon Zest
    Slightly beaten egg
    Oil for deep frying

    Gravy:
    1 Cup Water
    Chicken Cube/stock
    2 Tbsp. Cornstarch
    Salt
    ½ tsp. Ground Black Pepper
    1 tsp. soy sauce

    How to : Season the meat with salt and pepper. Mix the bread crumbs with finely chopped parsley and lemon zest. Coat the meat with the bread crumb mixture by dipping into the egg then to the bread crumbs. Do the coating procedure twice each cube of meat to achieve a thick and firm coating. Deep-fry and drain in kitchen towel. Serve with gravy.
    How to make gravy:
    Bring water to boil, add chicken stock, add ground pepper and salt, Add Cornstarch dissolved in water to thicken the sauce, stir vigorously until thick. Add 1 tsp. of soy sauce to have a richer color. Adjust the amount of pepper if u like it more spicy!

    Stir-fried Pancit with pork ribs


    pancit with pork ribs
    To prepare pork ribs:
    Boil the ribs with water for 30 minutes or until well done. Marinate with soy sauce for another 30 minutes. Brown the meat in a very hot pan with 2 Tablespoons of olive oil and straight to a very hot oven for 20 minutes.
    To prepare stir-fried pancit (egg noodles)
    1 onion
    1 garlic
    1 red pepper
    1 green pepper
    250 g egg noodles
    salt and pepper to taste
    Cook egg noodles by boiling 1 liter of water for 1 minute until done. On another pan, saute garlic and onion, add the peppers and add the noodles. Toss well until well mixed and season with salt and pepper.
    Serve pork ribs with stir-fried pancit.

    Roasted Chicken


    Roasted Chicken
    There maybe a hundred ways of roasting chicken but this one is quicker than usual roasted whole chicken! Tender and juicy!
    Ingredients:
    1 whole chicken
    1 lemon
    5 cloves garlic
    salt and pepper
    Fresh Mint
    Gravy
    Preheat oven to 250 degrees C. Butterfly the chicken (Literally cutting the chicken in half starting from the breast down to the bottom of the chicken but not cutting the back bones) like a butterfly. Crush 5 cloves of garlic, fresh mint, salt and pepper.Work the skin starting with your fingers, insert the garlim in between the skin and the flesh working from bottom part of the chicken forming a pocket. Separate the tissues by pushing further your hand into the leg part, breasts and wings. Insert Spices into the just formed pocket and rub the spices to the flesh.Add slices of lemon in it.Squeeze the rest of the lemon over the whole chicken and season the other side with salt and pepper. Pan-fry the chicken skin side down with olive oil until golden. This would take around 6 – 8 minutes each side. Transfer to oven proof dish and straight to the hot oven for 45 minutes. Done!
    Serve while still hot.
    To make the gravy:
    With the meat drippings in the pan (where the chicken was fried) add ½ cup of water, chicken cube (stock), 1 tsp. cornstarch, and season with pepper.Note: The herbs doesn’t really matter particularly mint. I just used mint because I have it fresh from the garden. Parsley, Corriander, lemon grass would be great as well, I think. I just found out that mint and garlic are good friends! The mint refreshes the garlicky flavor and broken by the lemon.. Really works well.

    Popular Posts