Your Culinary journey begins at home! When the kitchen isn't just a kitchen but a home laboratory full of experiments!
Looking for Something? Search here:
Sunday, July 13, 2014
Dada's breads
Saturday, August 04, 2012
Flat Bread

![]() |
| Make a well in center and add olive oil and sesame oil |
![]() |
| gradually add warm water while mixing, it will start to form small lumps |
![]() |
| flour starts to form larger lumps |
![]() |
| After adding the water, gather the lumps around the and knead like a dough |
![]() |
| Place the dough on a smooth and lightly floured surface |
![]() |
| Form into a log |
![]() |
| cut into pieces |
![]() |
| form into small balls |
![]() |
| flour the surface and the rolling pin |
![]() |
| flatten it using the palm of the hands |
![]() |
| Flatten the dough using a rolling pin |
![]() |
| Cook it on a flat pan |
![]() |
| It will rise like bubbles |
![]() |
| Flip it over |
![]() |
| ready to eat.. |
The bread is good as it is, use it as wrap or stuff it with goodness inside.
Some of the variations below:
![]() |
| stuffing it with thin cheese |
![]() |
| add ham |
![]() |
| wrap it like an envelope |
![]() |
| in the pan it goes |
![]() |
| waiting time won't be that long :-) |
Tuesday, June 24, 2008
Croissant
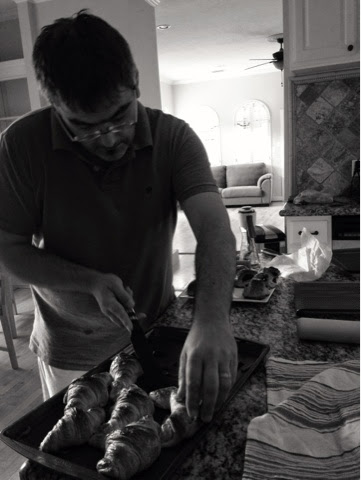
I’ve been itching to make croissant since a very long time and I finally made a dip to commit myself to make it and eventually dedicated to succeed in making one which was quite a challenge for me. I didn’t make it perfect, but its edible so-to-speak, anyway, hubby and I were the only judge and we evaluated the result. It wasn’t flaky enough and the layers of dough are a little bit thick as it should be. It took time to cook that what was stated in the recipe, the recipe says 15-20 minutes at 190 degrees C to brown but it took 45 minutes to brown. My croissants didn’t fluff much.
I’m not giving up just yet, I’m going to make it again.
I’m trying to figure out where did I went wrong in the process and possible factors and concluded the ff:
a) The recipe didn’t say what particular kind of flour to use, I used Bread flour type “00” Maybe there is not enough gluten in the flour causing the dough not so elastic.
To correct: use flour with high gluten content.
b) The flattened butter was a little bit thick and there was not enough space to spread it thinly, so during the folding process, some of the butter got out of the dough folds at the sides.
To correct: Allow a space at least about 2 inch at the sides to seal the dough when the butter is folded in.
My source of the recipe is from video jug;The video looks very easy to do, all you need is patience. The text version of the recipe I just paste it below; for easy reference.
CROISSANTS
You will need:
· 500 g flour
· 15 g active dry yeast
· 90 g sugar
· 15 g salt
· 300 ml warm milk
· 340 g butter , room temperature
· 1 egg, beaten with 2 Tbsp water
· some extra flour
· 1 rolling pin
· 1 knife
· 1 baking tray lined with parchment
· 1 mixer with hook attachment
· 1 mixing bowl
· 1 tea towel
· 1 plastic bag
· 1 brush
Step 2:
Begin the dough
Put the flour into the mixer. Add the salt, sugar, milk and yeast. Mix it on low for 8-10 minutes until it has a smooth elastic consistency. Dust the dough and a large bowl with flour. Remove the dough from the mixer and transfer it into a bowl. Cover it with the towel and let it rise until it doubles in size. This should roughly, take 1.5 to 2 hours.
Step 3:
Prepare the butter
Put a sheet of cling film onto your working surface. Place the butter on top and cover it with a second sheet of cling film. Flatten it with your hands, roll it into a rectangle of about 20 X 25 cm with your rolling pin and place it into the fridge to chill.
Step 4:
Roll out dough
After the dough has doubled in size, sprinkle it with a little bit of flour. Punch out the air with your knuckles and place it onto a floured work surface. Dust the dough with flour and roll it out into a large rectangle that is big enough to hold the sheet of chilled butter. Move the dough around in the flour. You may have to dust the table again, if you need to.
Step 5:
Fold in butter
Unwrap the chilled butter and place it onto the upper part of dough. Fold the dough around the butter to enclose it completely. Lift the dough and sprinkle the table with flour. Turn the dough around and roll it into another long rectangle. Fold the dough into thirds, brushing off the excess flour as you go. This completes the first turn. Now wrap it in cling film and place it into the fridge for a minimum of 25 to 30 minutes.
Step 6:
Turn the dough
At the end of the 30 minutes sprinkle your working surface with flour. Unwrap the dough and place it onto the work surface. Make sure that the dough has the seam vertically placed. Dust it with a sprinkling of flour and roll it out into another rectangle. Fold, brush and wrap, exactly as before. This now completes the second turn.
Step 7:
Chill and turn again
Place it back into the fridge for another 30 minutes. Once removed, roll and fold for the third and final turn. Make sure that the dough is well wrapped before placing into the fridge once more to chill overnight.
Step 8:
Shape the croissants
One chilled, cut the unwrapped dough into half, on a floured surface. Dust the dough with some flour and roll one half of the dough into a rectangle. Reflour the surface when necessary and continue to roll until the dough is roughly less than half a centimetre thick. Turn the rectangle around. Flour the surface and trim the edges of the dough neatly. Cut it into triangle shapes. Take the bottom of the triangle at its widest part and using your hands, tightly roll it up into a croissant shape. You can freeze the other half of the dough for use another time, or repeat the process and make more croissants.
Step 9:
Allow to rise
Place the croissants onto a prelined baking tray. Cover them with a clean plastic bag and leave to double in size.
Step 10:
Preheat the oven
Set the oven to 190ºC (375ºF/ gas mark 5).
Step 11:
Wash and bake
Once the croissants have risen remove the plastic bag. Very gently brush them all over with the egg wash. Place them into the centre of the oven. Bake them for roughly 15 minutes. When they are a deep golden brown remove them from the oven.
Monday, January 07, 2008
Hummus - A Spread that makes a difference!

Hummus is a popular dip or spread in middle eastern countries. Its primary ingredient is chick peas mixed with garlic and lemon juice. There are many variations with spices as well.

The hummus takes the center stage of this recipe - The spread that makes the difference! Since we are not in Middle Eastern country, we can’t easily find a good hummus unless you make it at home
Since Hubby and I have lived in the middle east for quite some time, it is not unusual for us to crave for some Arabic foods that have influenced our palates like Shawarma – a popular street food made of flatbread filled with meat either chicken, beef or lamb and of course with hummus as spread. In other countries it is popularly known as wraps, but the spread is not hummus, made of mayonnaise with other variations but it’s the same idea, it is a wrap basically, but its a makes a complete meal coz it has the basic food groops, ie, carb, vegetables, meats, and its worth mentioning, the chickpeas is full pack of protein, iron and vitamin C.
Ingredients:
1 can chickpeas (cooked)
2 tsp. ground cumin
1 tsp. paprika
1 tsp. cinnamon powder
Juice of 2 lemons
2 cloves garlic (grate)
½ Cup Olive Oil
Fresh Parsley and basil (chopped)
Procedure:
Grate garlic and set aside. Drain chickpeas and put in a food processor or blender, add lemon juice, grated garlic, cumin, paprika and cinnamon powder. Blitz for few seconds and stir. Blitz again for few minutes, while the machine is running, add the oil gradually until very fine and smooth. Garnish with chopped fresh parsley and basil.
For this recipe which has garlic, it is essential to have fresh herbs to go with it to fight the garlic breath – a distinctive odor after having some sauces with garlic. One of the cures of garlic breath is having something green, means with chlorophyll. This works wonders! Usually in Middle Eastern countries, they serve this with lots and lots of rockets, the purpose of which is to avoid garlic breath. Parsley also works well with garlic. Having that in mind, that’s why I added some parsley to the hummus.


As my option is not very limited, I just asked hubby to get me some parsley and pass it across the kitchen window, I got a handful of parsley and sweet basil, which was a great idea. So, having some greens at hand is very useful.
Straight from my tiny garden are fresh parsley and basil which we have grown them ourselves. We have a tiny garden in our terrace which original a space for ornamental plants but we squeezed them to one side to give a space for some herbs. We planted some seeds when we came back from vacation. So now, we have parsley, sweet basil, Thai basil, and Kangkong. Now I’m enjoying my little harvest for garnishes.

While the hummus is ready, prepare the meats to go with it.
Ingredients:
Beef
Sausage
White onion
Tomatoes
Cucumber
Slice onions and tomatoes thinly. Set aside
Slice the beef thinly and set aside
Grill the sausage.
While the sausage on the grill, in hot pan with a teaspoon of oil, sear beef by adding one slice by slice so that the beef will not curl up when cooked. Stir-fry until the sides of the beef is done. You can tell when its done when the sides of the beef slices turn dark brown. Remove from pan. Add the sliced onions to the same pan. Do not be tempted to add oil. Just brown the onion by moving it around, taking the flavor of the beef at the same time. Remove from pan. Take out the sausage on the grill and slice thinly.
Assemble the dish on a big tray and serve with flat bread on the side. Serve while the meats are still warm.
Monday, January 29, 2007
Chicken Sandwich with eggplant dip
Popular Posts
-
The other day, I remembered the chiffon cake recipe I once knew by heart way back when I was in High School. It has been a while I haven’...
-
I love carbonara. It doesn’t look very glamorous on the table yet, it really has mild flavors that just melt in my mouth. Ingredients:...
-
Apple Tarte It’s my first successful tarte ever! I finally had perfected the sweet pastry crust where usually I go wrong. I had a number of...