Looking for Something? Search here:

Thursday, August 28, 2008

Chiffon Custard Cake


The other day, I remembered the chiffon cake recipe I once knew by heart way back when I was in High School. It has been a while I haven’t made it and somehow my taste buds are itching for it then I came to realize that it is not in my journal. My sister used to make chiffon custard but I haven’t made it myself. Usually I ice the cake with royal icing for birthdays and other occasions which I sell as my extra income; that was a decade ago when I was still a student. The chiffon cake I knew and my sister’s custard recipe should be fine I thought. I remember how she told me how to do it. Knowing the chiffon cake, I was confident that I wouldn’t go wrong and so happy it turned out good. I was more than glad to indulge myself for a few bites and shared some to our neighbor.

Ingredients: (good for 9 inch x 9 inch x1.5 inch square pan)

For caramel layer:

¼ cup sugar

For Custard Layer

1 cup evaporated milk
½ cup sugar
3 egg yolks
1 Tablespoon custard powder

For Chiffon cake layer:

Mixture 1: (yolk mixture)
2 egg yolks
½ cup sugar
¼ cup oil
½ cup milk
1½ cup self raising flour (sifted)
1 tsp. Vanilla essence

Mixture 2: (egg white mixture)
5 egg whites
½ cup caster sugar (sifted)
¼ tsp cream of tartar

Procedure:

  1. Preheat oven to 200 degrees C (gas mark 5)
  1. Prepare the caramel layer. With a low heat, caramelize the sugar in the 9 x 9 x 1.5 inch square baking pan until sugar turns dark brown and coats the bottom of the pan. Be careful; this happens so quickly. Tilt the pan from time to time to spread the caramel. Leave the caramel to cool and set.
  1. Separate egg white from yolks taking care that the bowl for the egg white is completely clean, dry and free of dust. To save time in preparation, prepare 3 mixing bowls, 1 large bowl for egg white mixture, another for custard mixture and another for yolk mixture. When separating the egg white from yolks, place 3 yolks in one bowl (for custard mixture) and 2 yolks on the other (for cake mixture 1) Set aside the bowl of egg white far from other ingredients.
  1. Prepare the custard mixture. In a mixing bowl, mix egg yolk, sugar, milk and custard powder. Mix altogether until all well combined. Set aside.
  1. Prepare cake mixture 1(yolk mixture). In a separate mixing bowl, mix egg yolk and sugar, add oil, milk, sifted flour and vanilla essence. Mix well until well combined.
  1. Prepare egg white mixture. Before start beating the egg white, make sure the sugar is ready at the side. Add cream of tartar to egg white mixture. Using electric mixer, beat eggs at speed 1, when the egg white is bubbly increase to speed 2 until it forms a very soft peak; increase to speed 3 at this stage, gradually add sugar while beating until the mixture forms a stiff peak. Do not over beat.
  1. Using the same beaters, beat the cake mixture 1 to make sure it hasn’t set and all ingredients are well mixed.
  1. Fold-in the cake mixture 1 to cake mixture 2 using a rubber spatula until well combined but still airy. Take care not to over mix.
  1. Pour the prepared custard mixture into the prepared cake pan with caramel set at the bottom.
  1. Carefully pour the cake mixture to the center of the cake pan over the custard mixture. Level the cake mixture by pushing it to the corners and sides of the pan.

The cake now has 3 layers; caramel at the bottom, custard in the middle and the cake mixture at the top.

  1. Place the cake in the middle tray of the oven and pour boiling water in the tray until about half inch deep. The tray of water acts like a double boiler.
  1. Bake for 45 minutes to 1 hour at 200 degrees C. Test the cake pressing the cake lightly. If it springs back, its done, or insert a toothpick and if comes out clean, it is done. Take note not to open the oven when the before 45 minutes had passed, this will alter the rising of the cake.
  2. Allow to cool down in a rack and trace the sides of the pan with a spatula or knife to separate the sides of the cake from the pan. Using a cake tray, turn to flip the cake over. The caramel layer becomes the top layer.

Thursday, August 21, 2008

Wake Up And Smell the Mug

There’s no question about it, it is a lovely piece of art. I had got hold of it while having coffee in the hotel and was pleased with the presentation of a simple coffee. The coffee mug itself is a statement. They are modern and sleek mugs are so comfortable to hold with. If you are left-handed there is certainly a mug made just for you.

Now, if you are a coffee addict like me, then its time to grab one! This coffee mug is one of the new collections of Villeroy & Boch called NEW WAVE CAFFE is such a delight to sip coffee with. Check the online store for other products that compliments with it. Whether you are looking to upgrade your dinnerware or looking for a nice present to your loved ones, it is just about the right time to grab them while they are still on sale at 50% off MSRP prices through end of August 08. The good thing about it is they provide free shipping for all online orders over USD100.

Wondering what recipe to go with your nice mug of coffee? Hmmm… Try this Mocha cupcakes I’ve made last weekend.

Mocha Cupcakes

1 cup butter, softened

1 cup sugar

½ cup milk

1 ½ cup plain flour

1 Tablespoon baking powder

¼ cup cocoa powder

3 Tablespoons instant coffee

Topping

1 cup confectioner’s sugar

½ cup butter, softened

1 teaspoon instant coffee

Procedure:

Preheat the oven to 320 degrees F/ 160 degrees C. Line a 12 cupcake tray with fluted cupcake papers. In a mixing bowl, Light beat butter and sugar until creamy; add eggs and continue beating until light and fluffy. Add mil, flour and baking powder and stir to combine. Add remaining cake ingredients. Beat for 2 minutes until light and creamy. Divide the mixture evenly between the cake papers. Bake for 18 – 20 minutes. Allow to cool fully before icing.

Topping:

While the cupcakes are cooling, combine all topping ingredients in a mixing bowl. Decorate cupcakes using a spoon or piping bag with different designs.

Wednesday, August 20, 2008

Curried Seafood Pasta


Curried Seafood Pasta

Once in a while me and hubby crave for spicy and aromatic foods that reminds us of our days in India. Yes, we had lived there for 6 months. Before we had our apartment we lived in a hotel for a month with inclusive of dinner buffet. We were both not new to Indian food since we had also both lived in U.A.E. where Indian restaurants are just everywhere, but to some point, when we were in India, having all Indian food every night at the buffet table with the entire spicy aroma around the dining hall it lingers to your shirt and even to the room. At the end of the day, you smell spicy as well. Lols

I think we both have explorative palates, we try some of the dishes that are unfamiliar to us, knowing that it is served the buffet gives us confidence that the food is safe. So we did tried several foods that are new to our senses, new to our eyes and nose and the stomach have no choice for that matter. Anyways, the bottom line of the adjustment in terms of food you know when it comes out the other way in the morning. When there’s no problem, it’s ok. At times it became a daring game for us who has a tougher stomach. Despite few stomach upsets, overall I love the experience.

Well, I’m truly amazed of the diversity of food that this world has to offer. Depending on where you are. The challenge is to enjoy, savor the local flavors wherever you are.

And this dish is an Indian influence to us, which we crave for from time to time. It is creamy and spicy at the same time.

Ingredients

2 large onions (Sliced)

3 cloves garlic (Diced)

200 g. squid (cut into rings)

200 g. Shrimps (shelled and deveined)

300 ml coconut milk

200 g. fish curry paste

1 tsp. chili flakes (optional)

Parsley (finely chopped)

Pasta

Salt and pepper

Procedure:

Cook pasta until al dente. While cooking the pasta, in a medium fire, sauté garlic and onions until onions become translucent. Add shrimps and squid until all the liquid has evaporated stirring from time to time. Add fish curry and chili flakes paste and continue stirring. Lastly, add coconut milk. Reduce fire and simmer for 2-3 minutes. Add pasta and mix with the sauce until well absorbed. Season with salt and pepper. Lastly, add parsley just before serving. Serve while still hot.


Sunday, August 17, 2008

MINI CUPCAKES

Mini Cupcakes

Warning! These mini cupcakes are addictive!

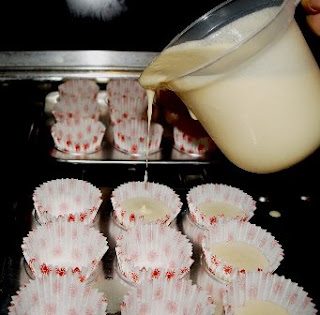
This is my version of Paz’s Yellow Cupcakes. She had this lovely YELLOW CUPCAKES decorated with yellow roses which looked so great that I can’t resist from doing it. I didn’t have the right size of fluted paper cups, but I have a smaller one, slightly bigger than the paper cups I usually use with COCONUT MACAROONS, I think it is the next to the smallest size. Anyway, this obstacle hasn’t prevented me from doing it. It turns out to be a bite size which is addictive. Every time I take one, I secretly say to myself “this is gonna be the last bite” but me and hubby didn’t stop until we realized there are no more left! It goes well with tea.

Here’s the original recipe that PAZ posted but I have some alteration on the procedure coz I’m not using the same material.

Yellow Cupcakes

Source: The Fannie Farmer Baking Book by Marion Cunningham
Yield: 18 mini cupcakes

6 Tablespoons (3/4 stick or about 1/3 Cup) butter, melted

2 eggs

1/4 Cup milk

1 teaspoon vanilla extract

1 Cup all-purpose flour

1 Cup granulated sugar

1 teaspoon baking powder

1/4 teaspoon salt

Confectioners’ sugar or Chocolate Butter Frosting


Preheat the oven to 350F. Line small muffin pans with fluted paper baking cups.


Combine the melted butter, eggs, milk, and vanilla in a mixing bowl and beat well.


Put the flour, granulated sugar, baking powder, and salt in a sifter or strainer and sift them over the butter-and-egg mixture. Beat until the batter is perfectly smooth and thoroughly combined. Spoon into the prepared muffin pans, filling each cup about two-thirds full.


Bake for about 15 to 18 minutes, or until a toothpick inserted in the center of a cake comes out clean.


Remove from the oven and let them cool in the pan for 2 minutes, then turn out onto racks to cool completely.

Popular Posts